Creating a Pie Menu
A Pie Menu is a circular popup. Its buttons sit around a center point, and you reach one by flicking the mouse toward it. It is the fastest kind of menu to use.
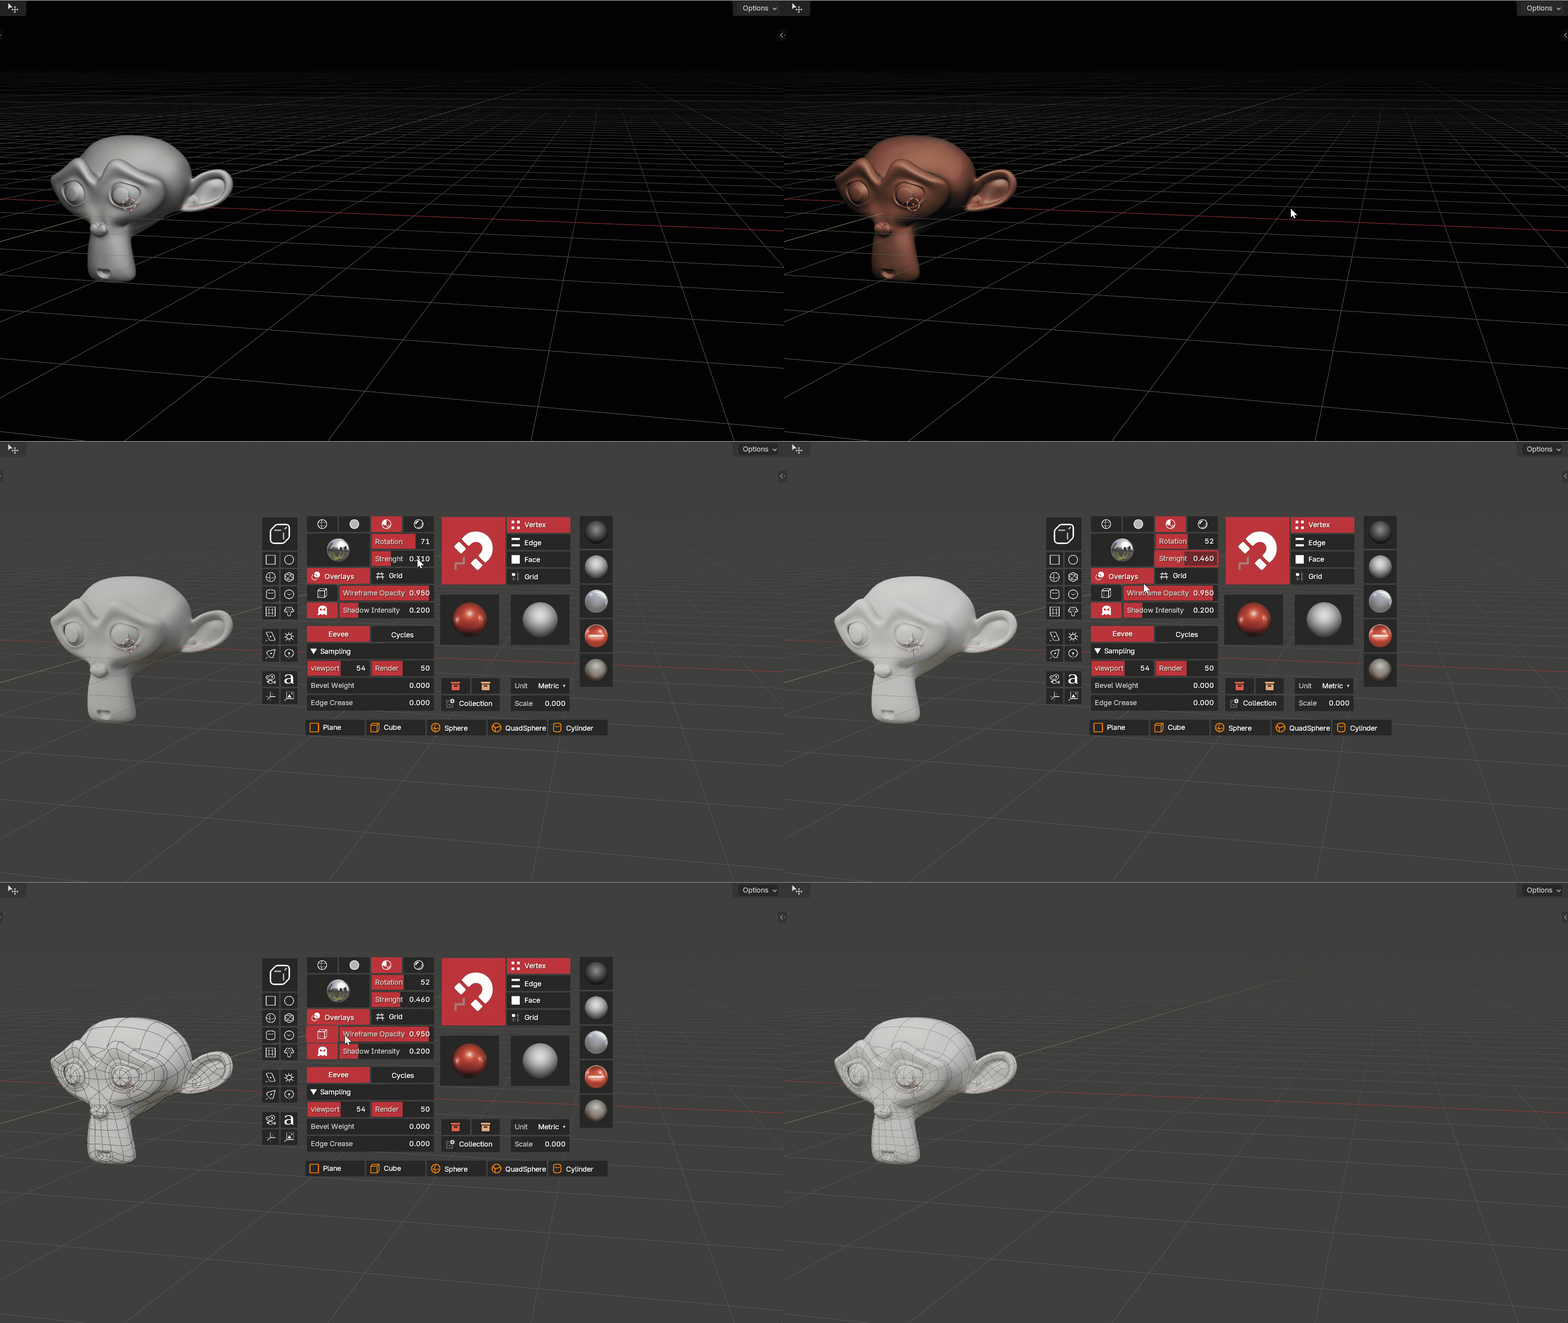
This page builds the pie below step by step: 8 buttons that add primitives and a grid of modifiers, opened with Shift Q in the 3D Viewport.
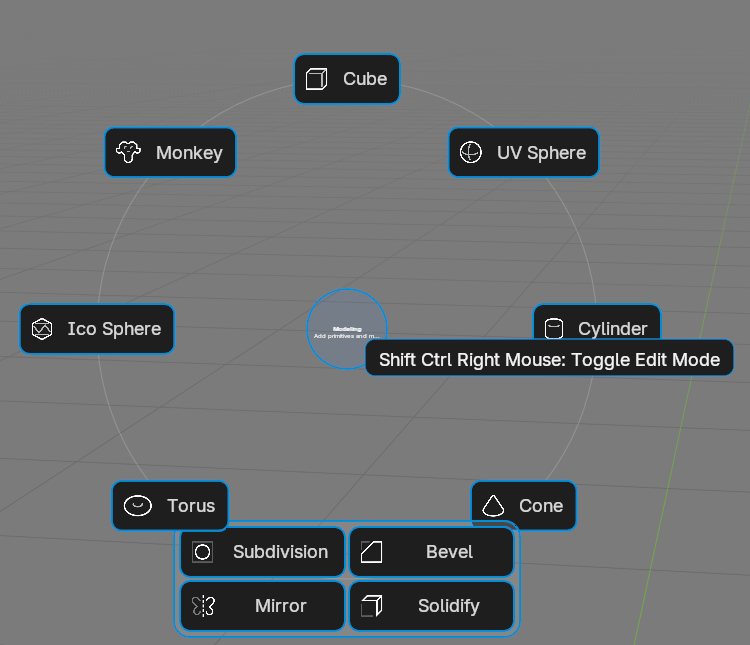
Everything happens in Edit > Preferences > Add-ons > PieMaster, in the Presets tab.
1. Pick a Preset
A menu always lives inside a preset, a named group of menus you can export and share.
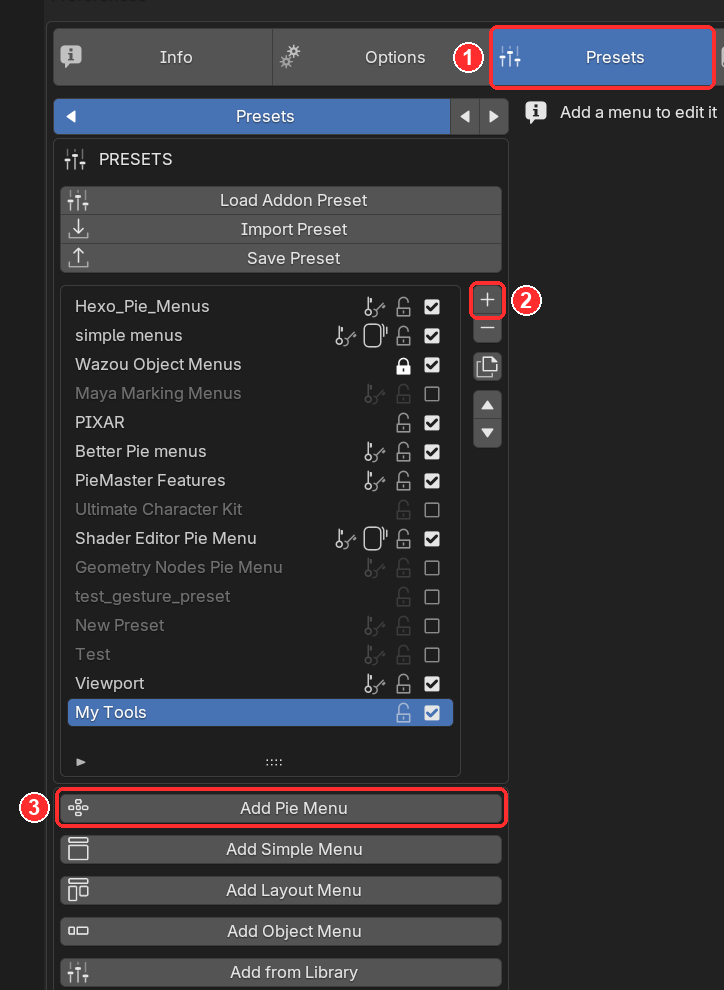
- Open the Presets tab.
- Click + to create a new preset, or select an existing one in the list. Double-click a preset to rename it.
- Click Add Pie Menu.
The pie is created at once, named New Pie. No dialog opens.
Preview opens by itself
With Auto Preview - Edit Mode on New Menu on (Options tab, on by default), the new pie appears right away in the 3D View, in Edit Mode. See step 5.
2. Name the Menu
The new pie shows up in the MENUS list. Double-click its name to rename it. The name is drawn in the center circle of the pie.
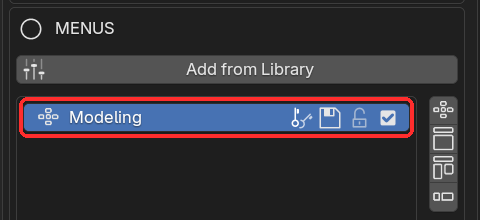
Once the preset holds a menu, the Add buttons turn into the small icons on the right of the list: pie, simple, layout and object menu.
3. Menu Settings
The Buttons tab opens with the settings of the whole menu.
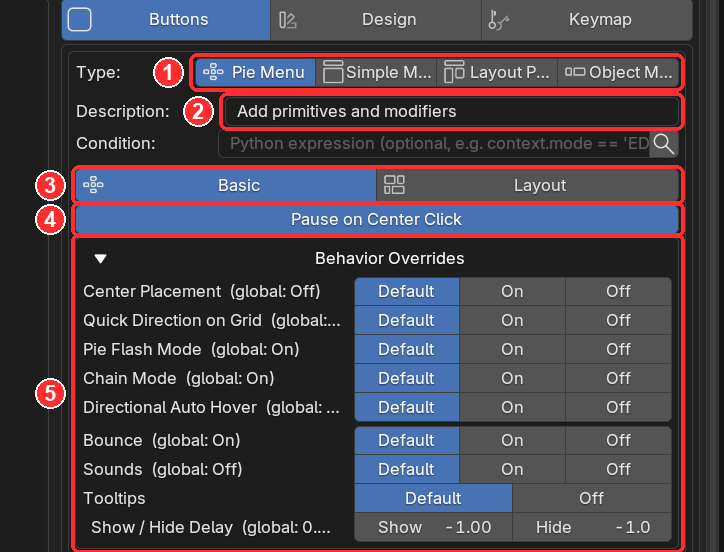
- Type: keep Pie Menu. You can switch a menu to another type later.
- Description: optional text shown when you hover the center circle. Condition below it hides the whole menu unless a Python expression is true (see Conditions).
- Basic / Layout: how the buttons are placed (see below).
- Pause on Center Click: clicking the center circle freezes the pie open, so you can click several buttons in a row. Turn it off to have the click close the pie instead.
- Behavior Overrides: force a global option On or Off for this menu only. Default follows the Options tab.
Basic vs Layout
| Mode | Result |
|---|---|
| Basic | Classic radial pie: center circle, trail line, buttons spread evenly around a circle. Quick Direction and Pause work. |
| Layout | No center circle. Buttons keep the positions you drag them to, like a Layout Menu, but the menu still opens at the cursor. |
Every field is described in Menu, Slot & Column Settings.
4. Add Buttons
A pie is made of slots, one per direction. A slot holds one button, or a grid of buttons.
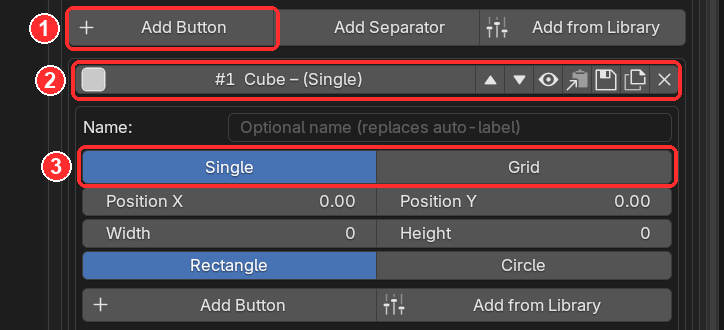
- Add Button creates a new slot holding one button. Add Separator creates an empty slot, to leave a gap in the circle. Add from Library inserts a button you saved before.
- Each slot gets a header:
#1 Cube – (Single). Click it to open it. The arrows reorder the slots, the eye hides one, the other icons save, copy, duplicate or delete it. - Single or Grid: one button in this direction, or several buttons arranged in a grid.
Direction order
Slots are spread evenly around the circle. Slot #1 is at the top, the next ones follow clockwise. With 8 slots you get the classic 8 directions; with 4 you get top, right, bottom, left.
Button settings
Under the slot, the button itself:
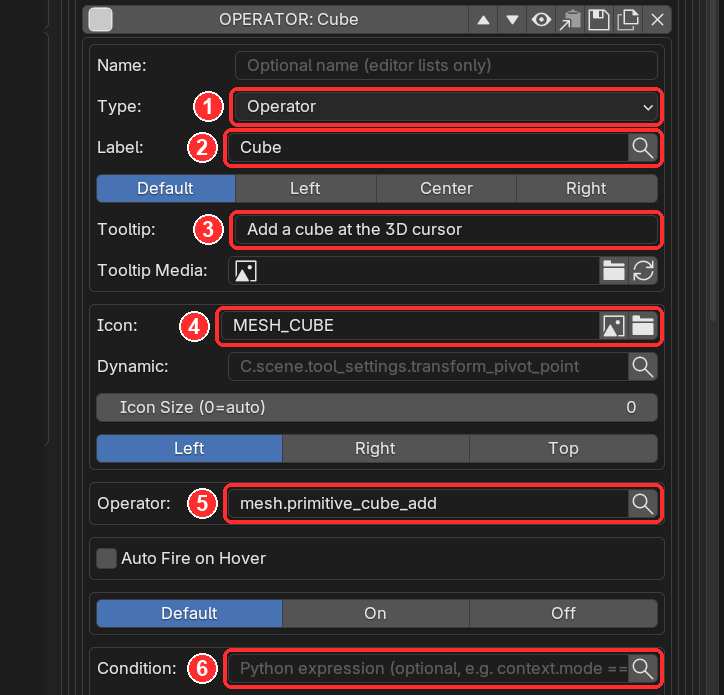
- Type: what the button does: Operator, Property, Python, Pie Call... See Button Types.
- Label: the text on the button.
- Tooltip: shown when you hover the button.
- Icon: a Blender icon name such as
MESH_CUBE, or a path to a.png. The two icons on the right open the icon picker and the file browser. - Operator: what runs on click, here
mesh.primitive_cube_add. The magnifier searches every operator. - Condition: hides the button unless a Python expression is true.
A grid of buttons in one direction
Slot #5 of the example holds four modifiers in one direction.
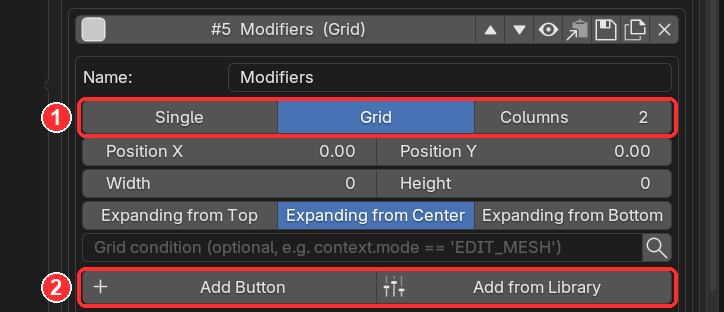
- Switch the slot to Grid and set Columns (2 here).
- Add Button inside the slot adds a button to the grid.
All slot fields are described in Slot Settings.
5. Edit in the 3D View
Preview in 3D View (above the Buttons / Design / Keymap tabs) shows the pie live in the viewport. Edit Mode lets you edit it right there.
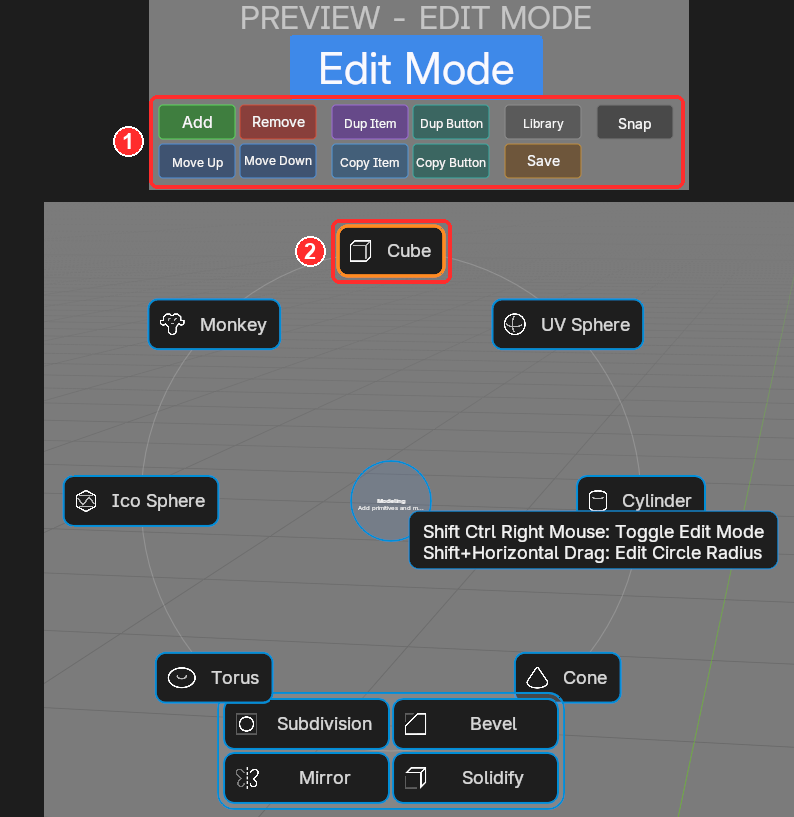
- The Edit Mode toolbar: Add, Remove, Move Up / Move Down, duplicate, copy, Library, Save and Snap.
- Click a button to select it (orange outline). Double-click opens an edit popup in the viewport.
The panel in the bottom-left corner of the viewport lists every Edit Mode action:
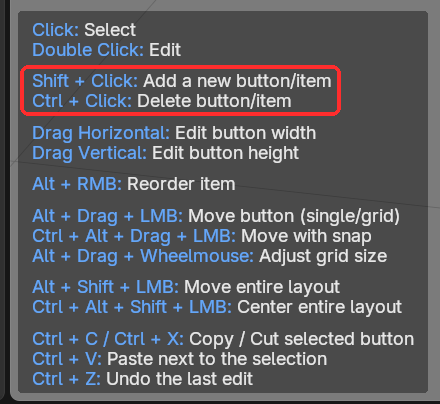
The quickest way to build a pie: Shift + Click adds a new button, Ctrl + Click deletes one. Drag a button sideways or up and down to resize it. Shift + Horizontal Drag on the center circle changes the radius.
Tip
Ctrl + Shift + Right Mouse toggles Edit Mode. Click Stop Preview when you are done.
Add any Blender button
Right-click a button or property anywhere in Blender and choose PieMaster - Add to Active Pie Item: it is added to the pie you are editing.
6. Set the Shortcut
Open the Keymap tab.
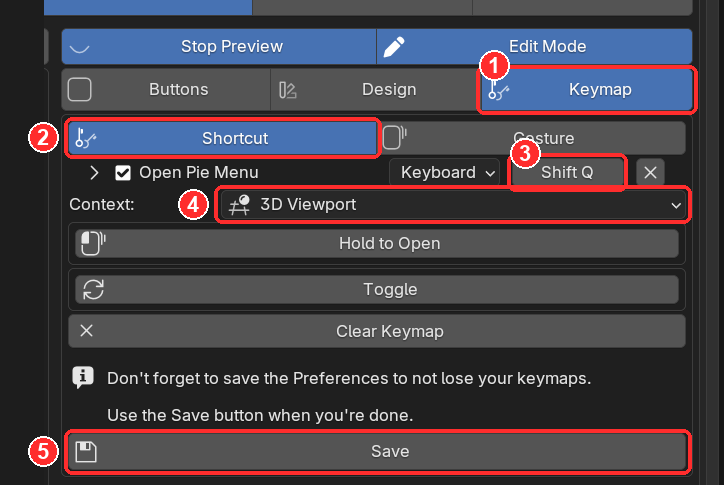
- Open the Keymap tab.
- Keep Shortcut. Gesture puts several menus on one shortcut, picked by the shape you draw (see Gestures).
- Click the key field (Click to add a shortcut on a new menu) and press your keys. Here
Shift Q. - Context: the editor the shortcut works in. 3D Viewport here.
- Click Save.
Two options under the context:
- Hold to Open: hold the key to open the pie; a quick tap runs another operator instead.
- Toggle: press the shortcut again to close the pie.
Save the Preferences
Shortcuts are kept by Blender: save the Preferences too, or the shortcut is lost when Blender restarts.
Avoid conflicts
Keys like G, R, S, E or Tab are already used by Blender. See Avoiding Conflicts.
7. Change the Look
The Design tab sets colors and sizes for the whole menu. The PIE block holds the settings specific to pies:
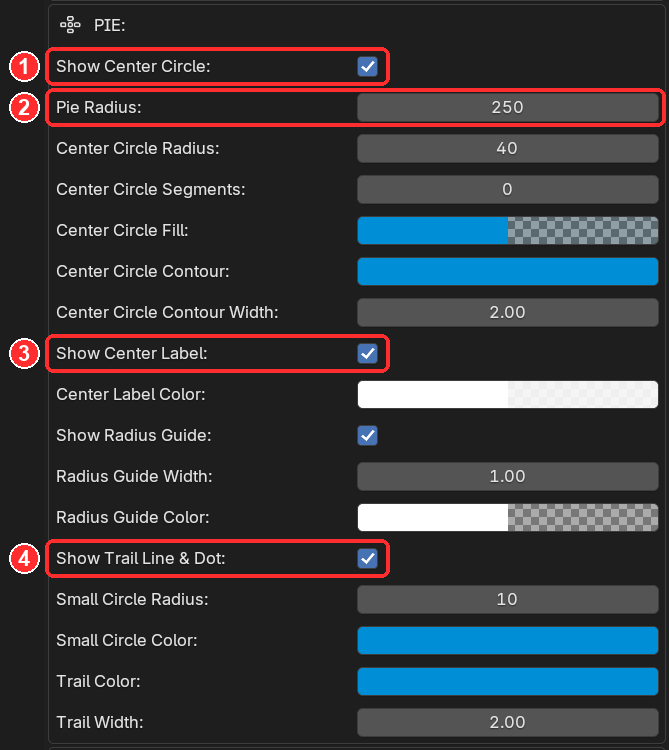
- Show Center Circle: the circle in the middle. Not shown in Layout mode.
- Pie Radius: distance between the center and the buttons.
- Show Center Label: the menu name inside the circle.
- Show Trail Line & Dot: the line drawn from the center to the cursor.
More in Design.
8. Global Pie Options
The Options tab, under Menus Settings, holds the settings shared by every pie. Each menu can override some of them with its Behavior Overrides.
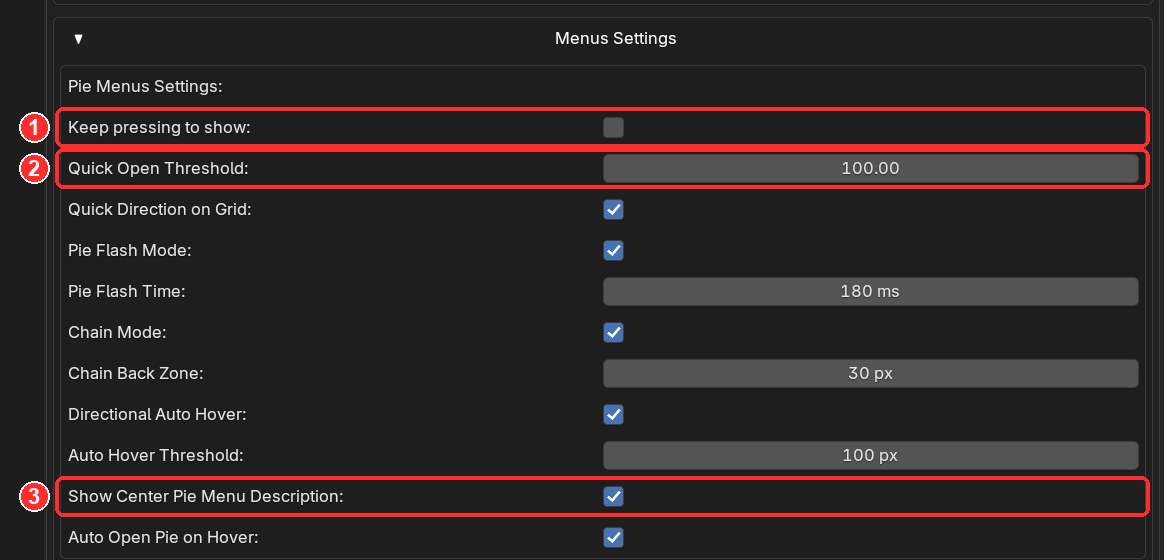
- Keep pressing to show: the pie stays open only while you hold the shortcut; releasing it runs the hovered button.
- Quick Open Threshold: how far you must flick, in pixels, for Quick Direction.
- Show Center Pie Menu Description: shows the Description when you hover the center circle.
Every option is described in Preferences.
Using the Pie
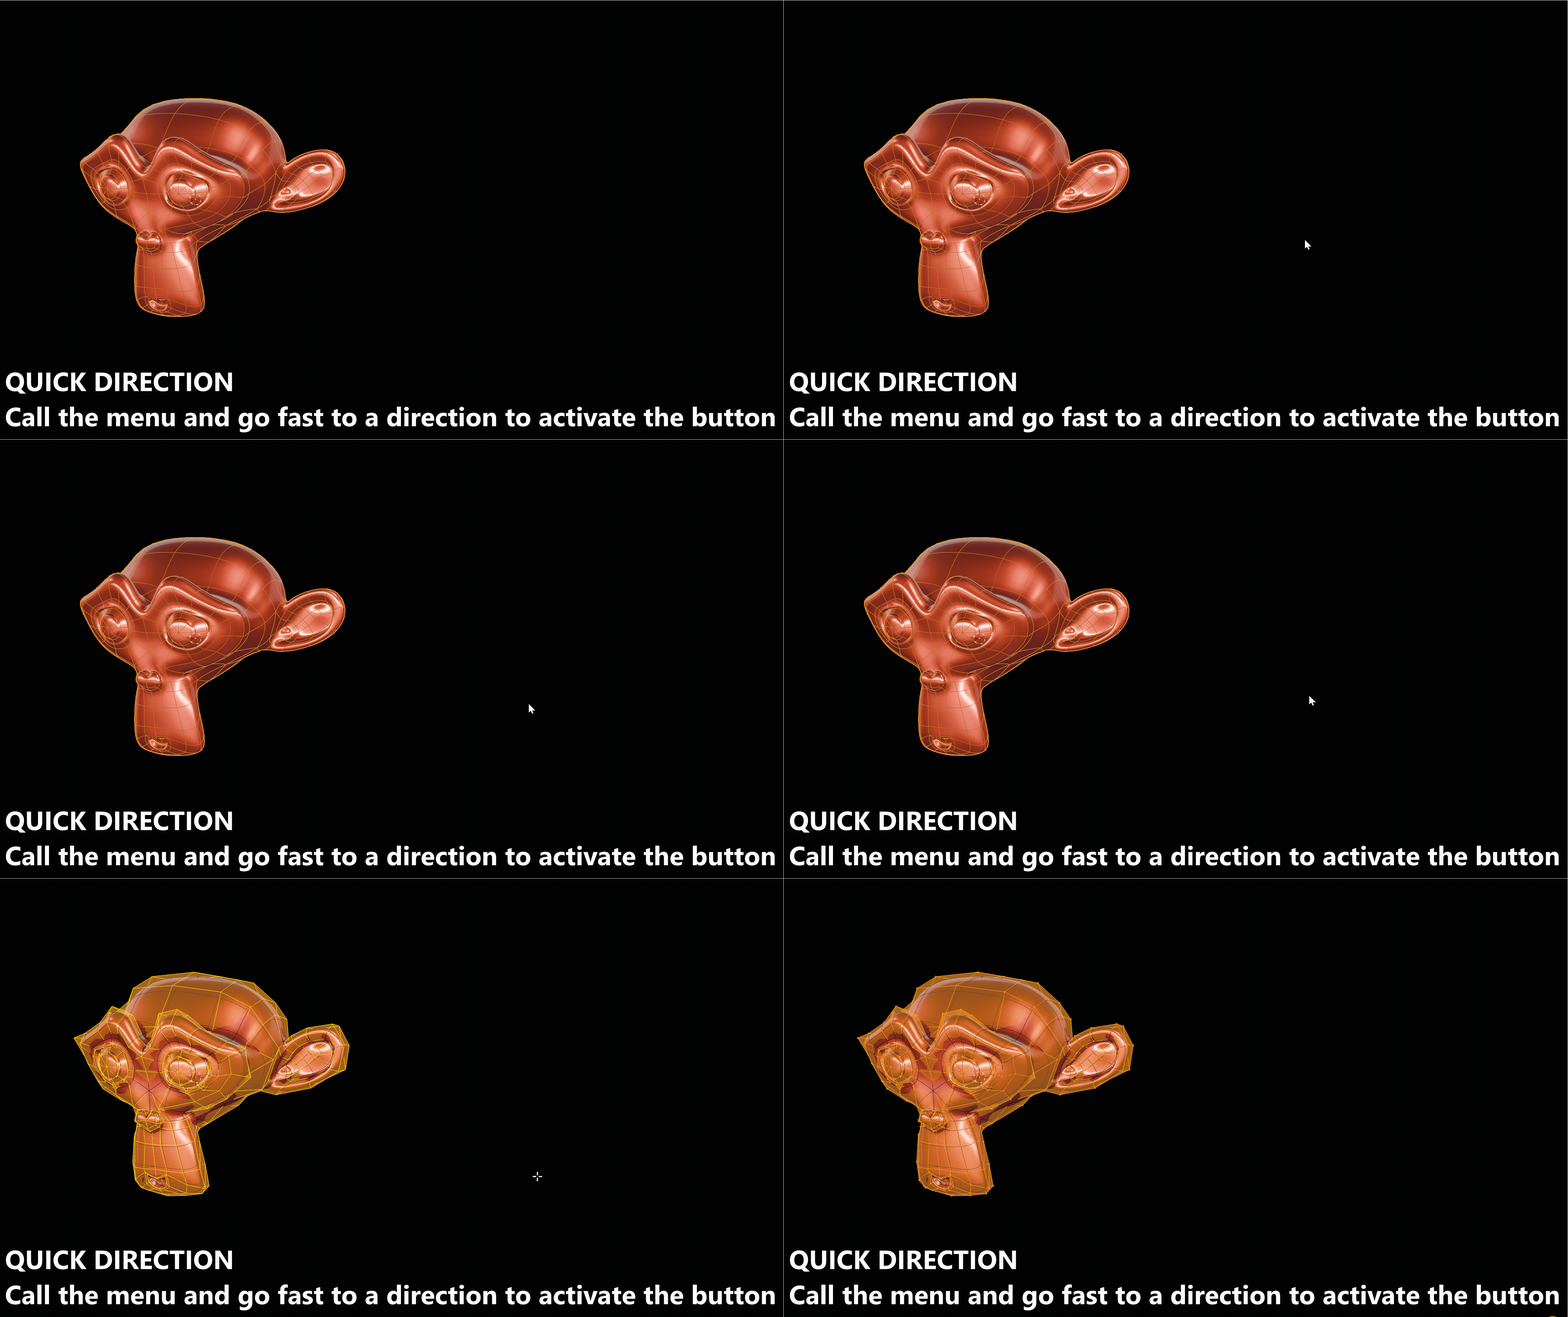
Quick Direction: press the shortcut, flick toward a button and release the key. The button runs without a click. This is the fastest way to use a pie.
Pause: click the center circle to freeze the pie open and click several buttons. Click the center again or press Esc to close it. Dragging the center circle moves the pie.
Nested pies: a Pie Call button opens another pie. Build a main pie that leads to specialized ones. With Chain Mode, the previous pie's center stays on screen so you can walk back.