Quick Start — Your First Pie Menu in 5 Minutes
This guide walks you through creating a working pie menu from zero.
What you'll build: A pie menu that opens on Q in the 3D View and lets you switch between Object Mode, Edit Mode, and Sculpt Mode.
Step 1 — Open the Editor
Go to Edit > Preferences > Add-ons and click on PieMaster to expand its panel.
This is where you'll build all your menus.

Step 2 — Create a Preset
Click Create New Preset and name it My Menus.
What is a Preset?
A Preset is a folder that holds your menus. You can have multiple presets for different projects or workflows. Think of it as a "profile".

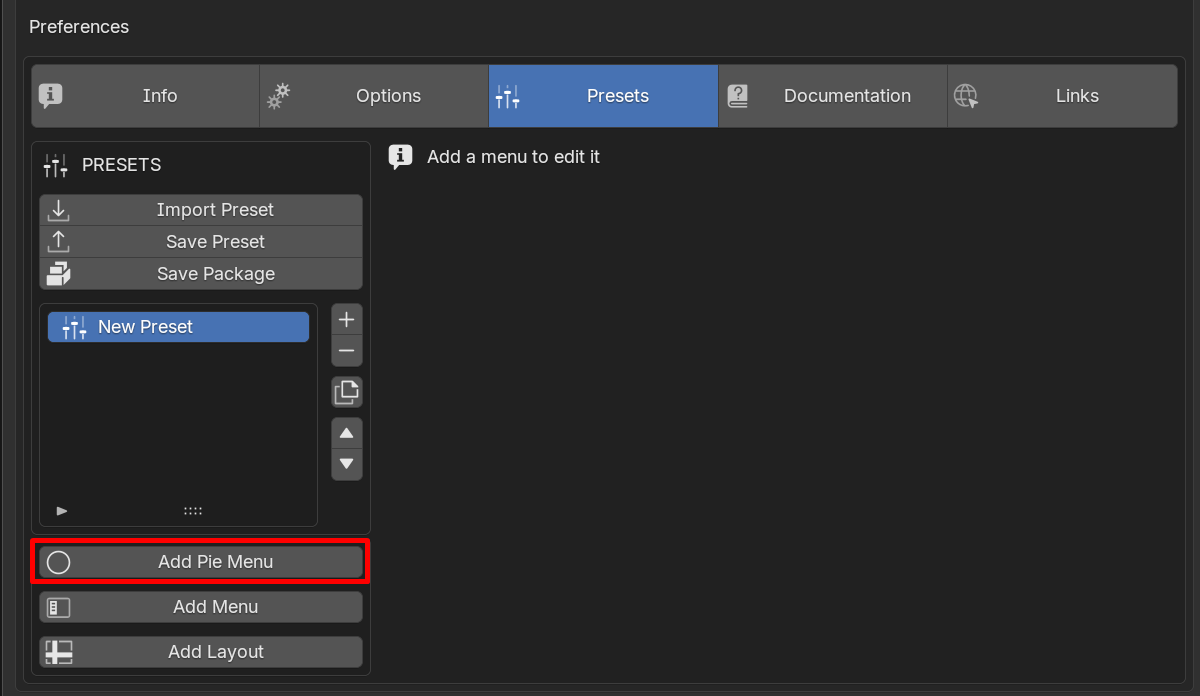
Step 3 — Add a Pie Menu
Click Add Pie Menu. A new empty pie menu appears.
Fill in the basic info:
| Field | Value to enter |
|---|---|
| Name | Mode Switch |
| Shortcut | Q |
| Context | 3D View |
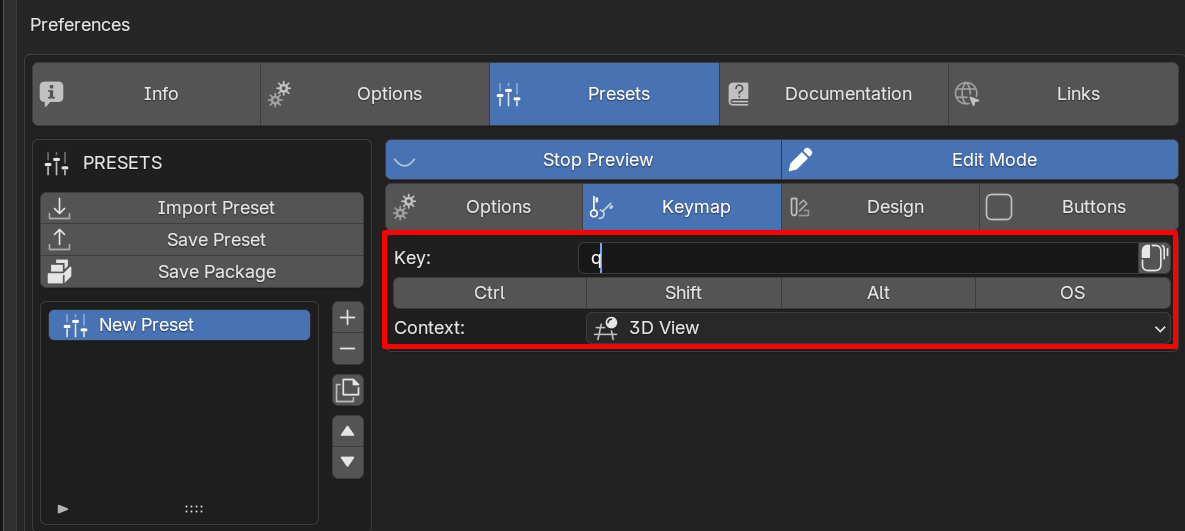
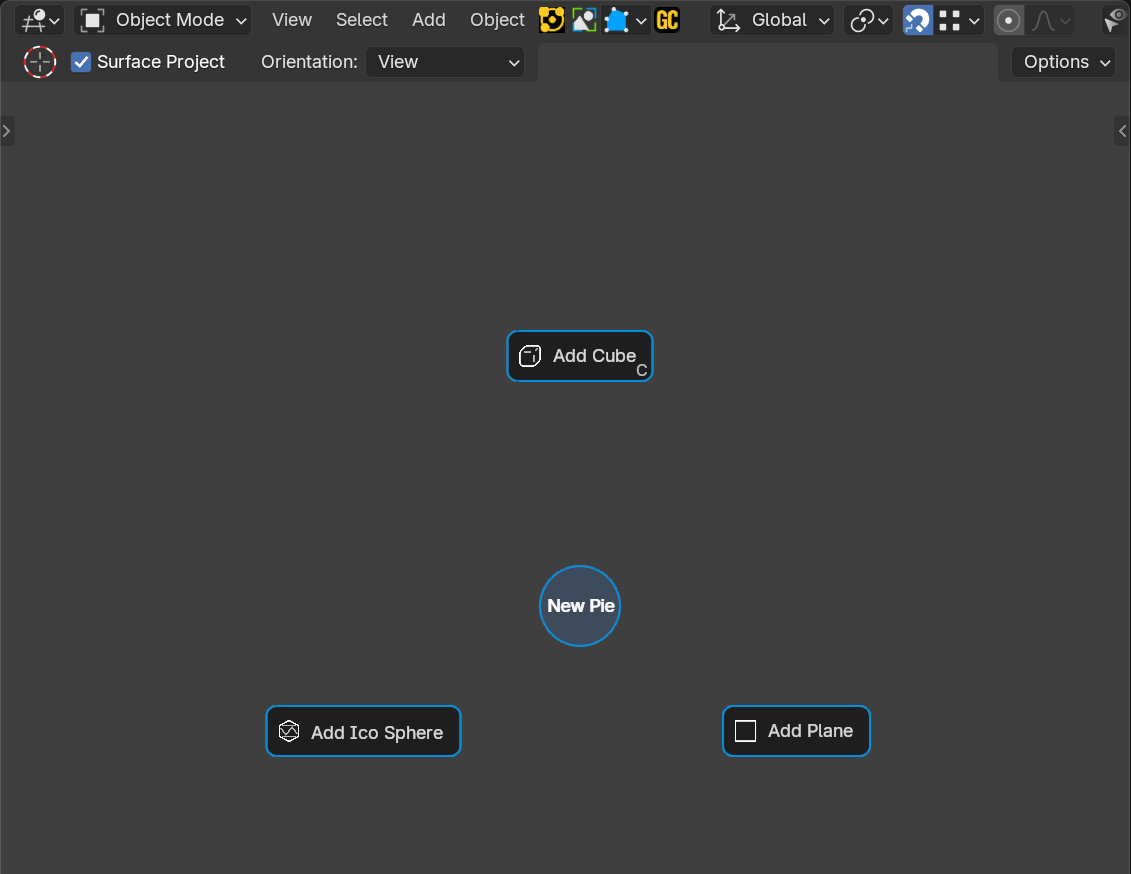
That will give you this menu, press Save to not loose the keymap

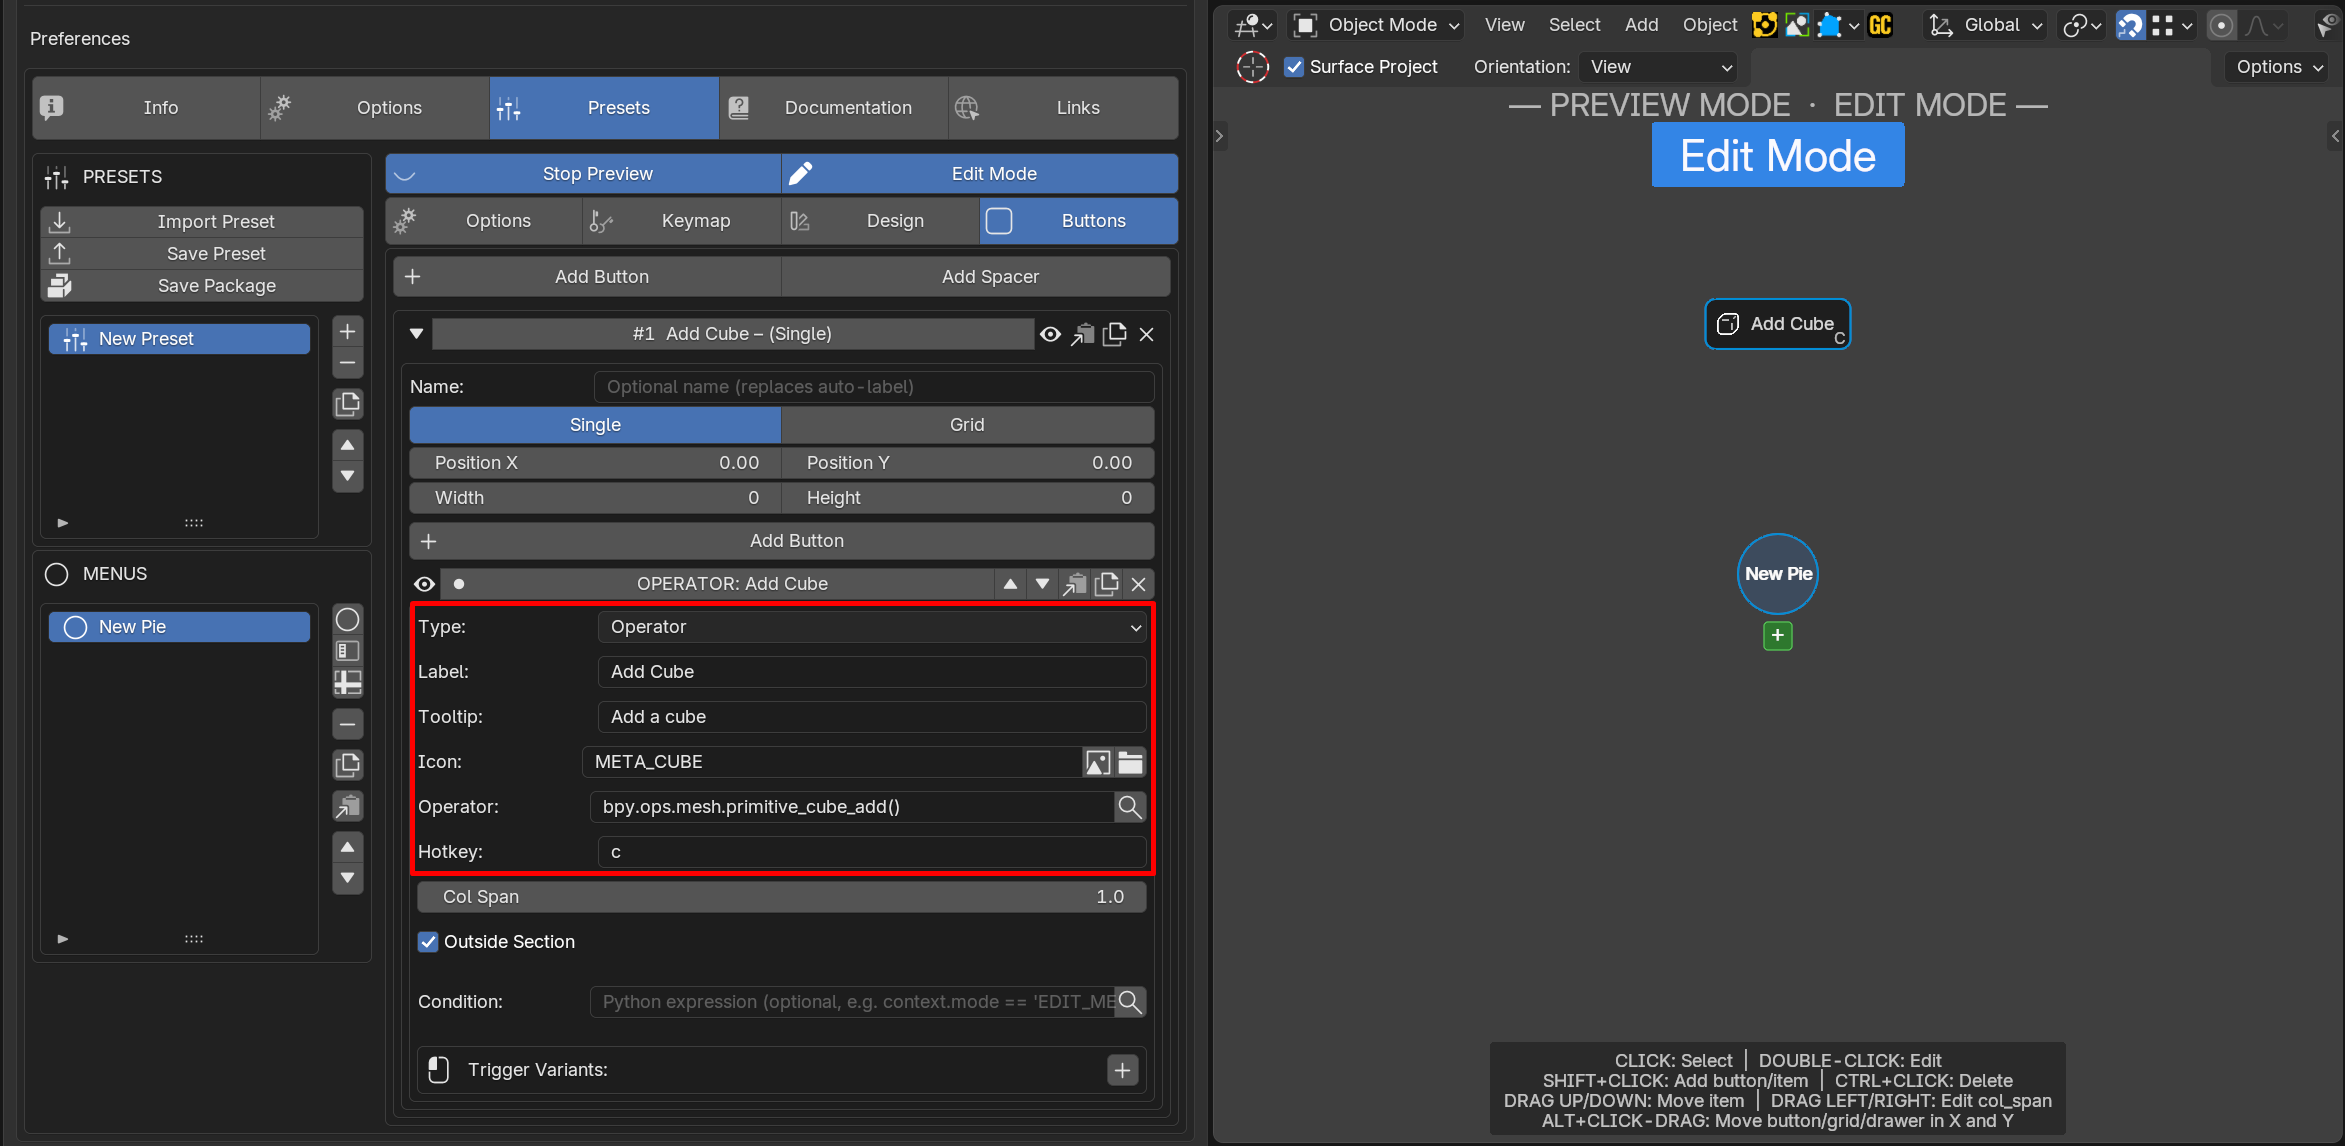
Step 4 — Add Your First Button
Click + Add Button. A new button appears in the first direction (top).

Configure it:
| Field | Value |
|---|---|
| Type | OPERATOR |
| Label | Add Cube |
| Description | Add Cube |
| Icon | META_CUBE |
| Operator | bpy.ops.mesh.primitive_cube_add() |
| Hotkey | c |
Repeat this to add two more buttons:
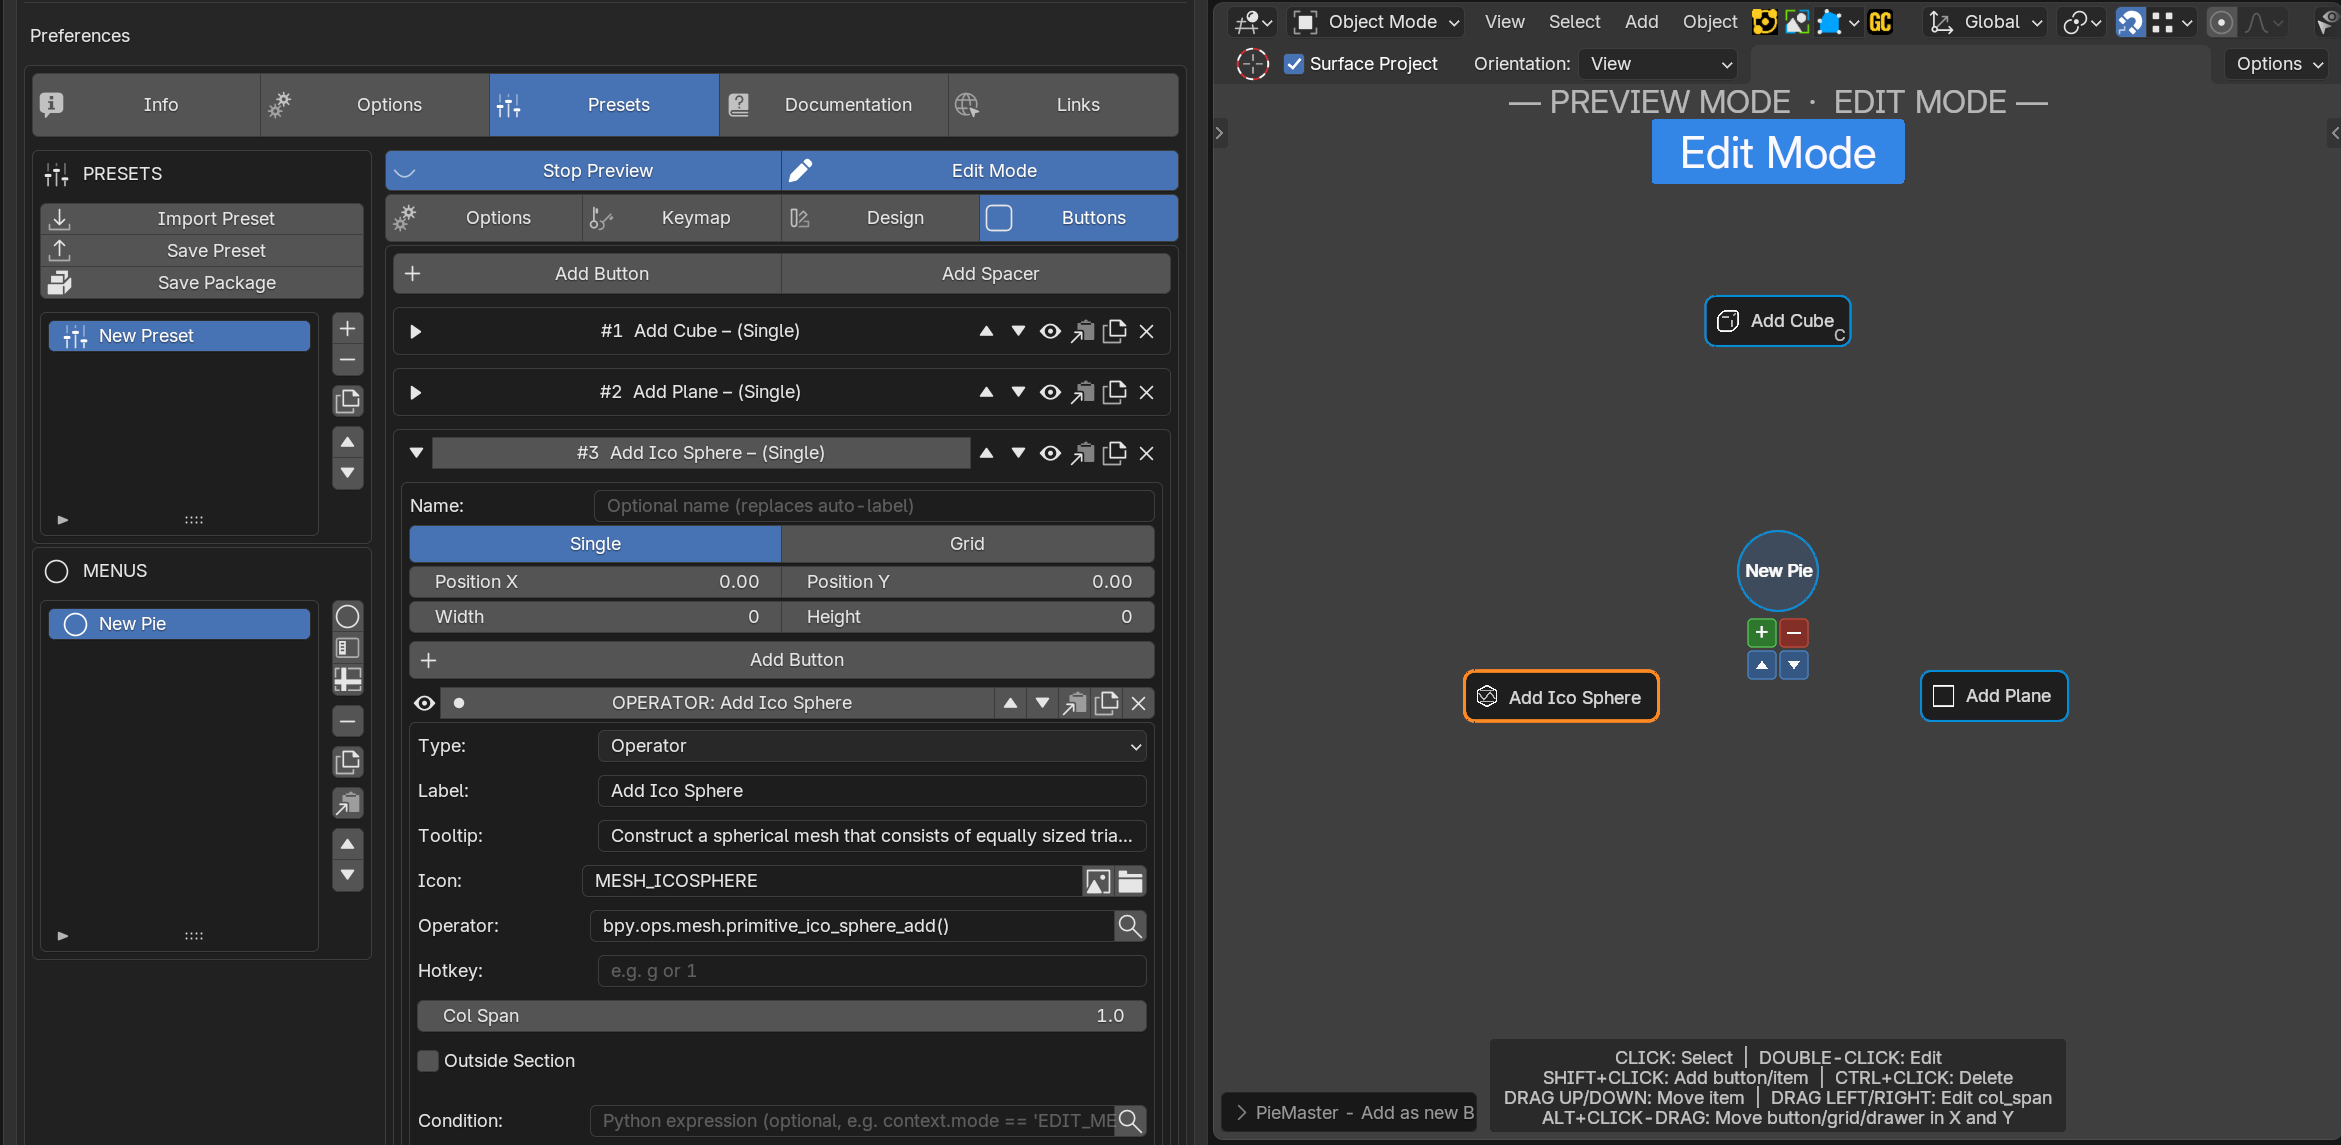
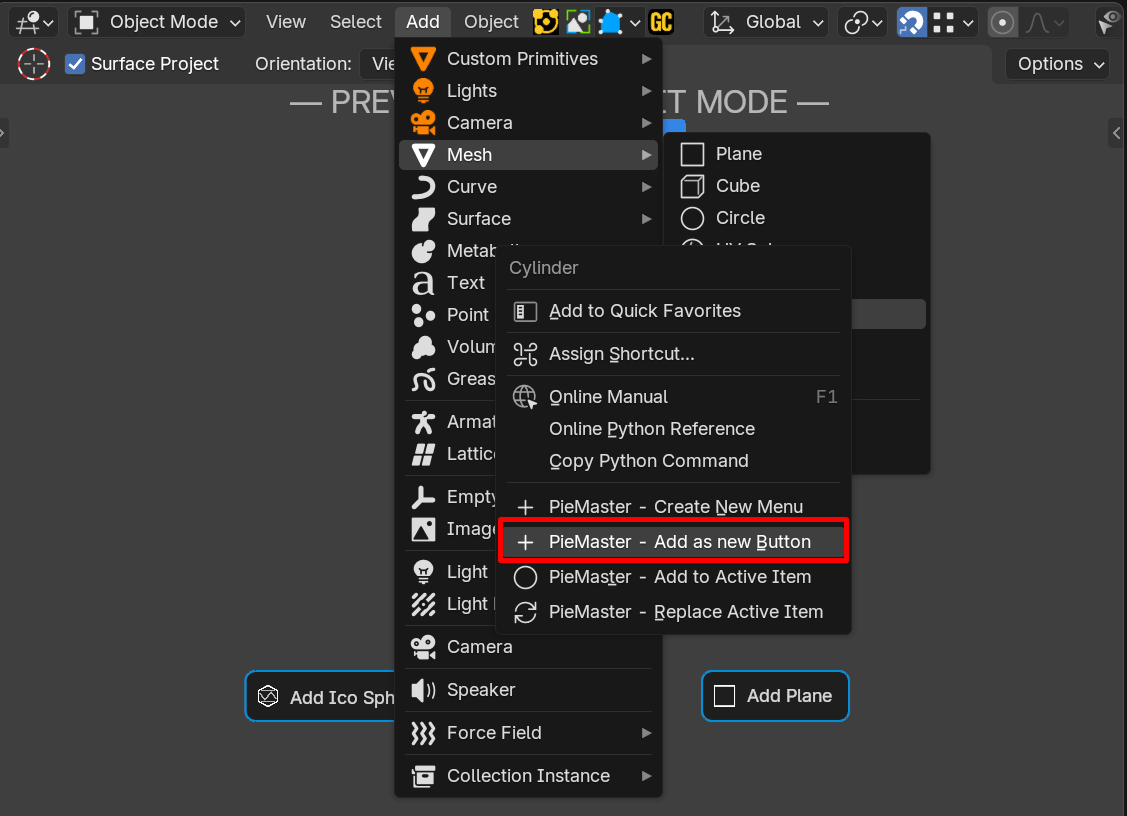
Faster way to add buttons
Right-click any button in Blender's interface → PieMaster: Add to Pie. The operator and its properties are captured automatically — no typing needed.
Step 5 — Test It
Disable the Preview mode, click somewhere in the 3D Viewport and press Q.
Your pie menu appears! Move your mouse toward a button and click it.
Or flick: move the mouse quickly toward a direction and release Q — the button fires instantly. This is called Quick Direction and becomes very fast with muscle memory.
What's Next?
- Understanding the Interface — learn the layout of the editor
- Creating a Pie Menu — all options explained
- Button Types — what each button type does
- Conditions — show/hide buttons based on context